Joining Wonderful Machine

Getting my work in front of a potential client is always a difficult proposition.

Like any business, most of my new clients are either by referral or when someone leaves one company for another. This is obviously a great way to get new clients but it has its limitations.

The main limitation is it can be a slow process. For example, one of the companies I shoot for is family-owned and the turnover there was next to nothing for years. Once people did start moving around I started getting phone calls from their past employees.

The second limitation I find is that I am often hired in a very limited field of photography. I was recently told that I had, “really created a name for myself in hair care products.” This is honestly GREAT and flattering because it is an obvious indication that my photographs are making an impact, but like anyone in a creative field I not only want to grow my business financially I also what to grow as a photographer. Part of that grown is shooting new, different, and more difficult products and spaces.

I recently had the honor of being accepted and joining Wonderful Machine.

Screen Shot 2021-04-28 at 1.46.02 PM.png

Wonderful Machine is a marketing engine for commercial photographers that has a selection of about 600 photographers in 41 countries.

They don't accept everyone and as they state on their website, “The quality of your photographs & website and the uniqueness of your specialties & location are our primary concerns. Not every photographer is going to be a good fit for us.”

After submitting my portfolio for review and then going through an approval process I was asked to join.

My hope with joining Wonderful Machine is that I am able to move closer to my goals as a business and more importantly as a photographer.

Creating Gradients on a Shiny Product One

In this video, I talk in detail about how to create beautiful gradient light on a flat shiny object. I start by discussing how to create a gradient on the non-shiny background to give everyone a good base of understanding. Then I move on to discussing how to use a diffusion panel to create a gentle gradient on a Helle knife blade.

Barn doors

(The one I am using is by fotodiox but are no longer available)

Rosco Diffusion Filter Kit, 12 x 12 Sheets

Savage Diffusion Plastic Roll

Paul C. Buff Einstein Strobes used

Crevo Boots Top Down Shot

This week I'm working on a top-down shot for my boot project using Crevo boots. In this video, I'll take you behind the scenes and show how I set up two lights to create a low key moody image. Also, I go in-depth on composition and the styling for this image and I talk a little about coming up with the travel theme and how I decided on the props to use.

Low Key Two Light Setup

During this behind the scenes video I’m back working on my boot project. I purchased these Crevo boots back in December but I’d been so busy with client work that they set in storage waiting to be photographed. In this video I walk through the two light setup I use, go in-depth on my process for focus stacking and take the camera off the stand and grab detail shots.

DIY Photography Diffusion Panel

Learn to build the quickest, cheapest, and most versatile photography diffusion panel for product photography. In this video, I give step by step instructions on how to build a PVC pipe diffusion panel. Great for any studio photography including still life and products. Make any size you need in minutes.

Saphir shoe polish Behind-the-Scenes

I'm in the studio photographing Saphir shoe polish as a "detail" shot for my series of boot photographs. I take an in-depth look at my lighting setup and composing the image. After I capture a top-down photo I get the camera off the stand and take some shots freehand.

Top-Down Horizontal

I'm back in the studio to take a photo of some new-to-me Johnston & Murphy boots. I purchased these used boots online this past week in hopes that they weren't too scuffed up and I could use them for my boot promo project. Luckily, they were in really good condition. To make them look even better I decided to break out my Saphir shoe polish and shine kit and give them a good once over. With my kit strewn about I thought it would make a great scene for the next photo. Check out the video as a walk through the setup and concept.

Location Product Photography

Today I took my studio on location. In my continuing project of creating a unified photography promo of boots I set up in a local park. I scouted the location several days before and found a really interesting root next to a boulder. The first chance I had, I got up nice and early and dragged myself and my gear to the park. I carried sixty pounds worth of gear down a hill near the Stones River including my camera, light stand, Paul C. Buff Vagabond II, Einstein strobe, beauty dish and boots. I think it was well worth the effort though!

A Beer bottle that Shines in the Sun

Silent Super F2

After I watched the documentary “California Typewriter” I went out and found an old 1950's Smith Corona Silent Super. At almost 70 years old it still works perfectly. I like mechanical things in general and the only other thing I own and revere as much as my typewriter is my 1970's Nikon F2 film camera.

I used them both! I shoot black and white film that I process at home. Also, if by chance you ever get a postcard from me... that's right... it was typed on an actual typewriter.

Star of the Show

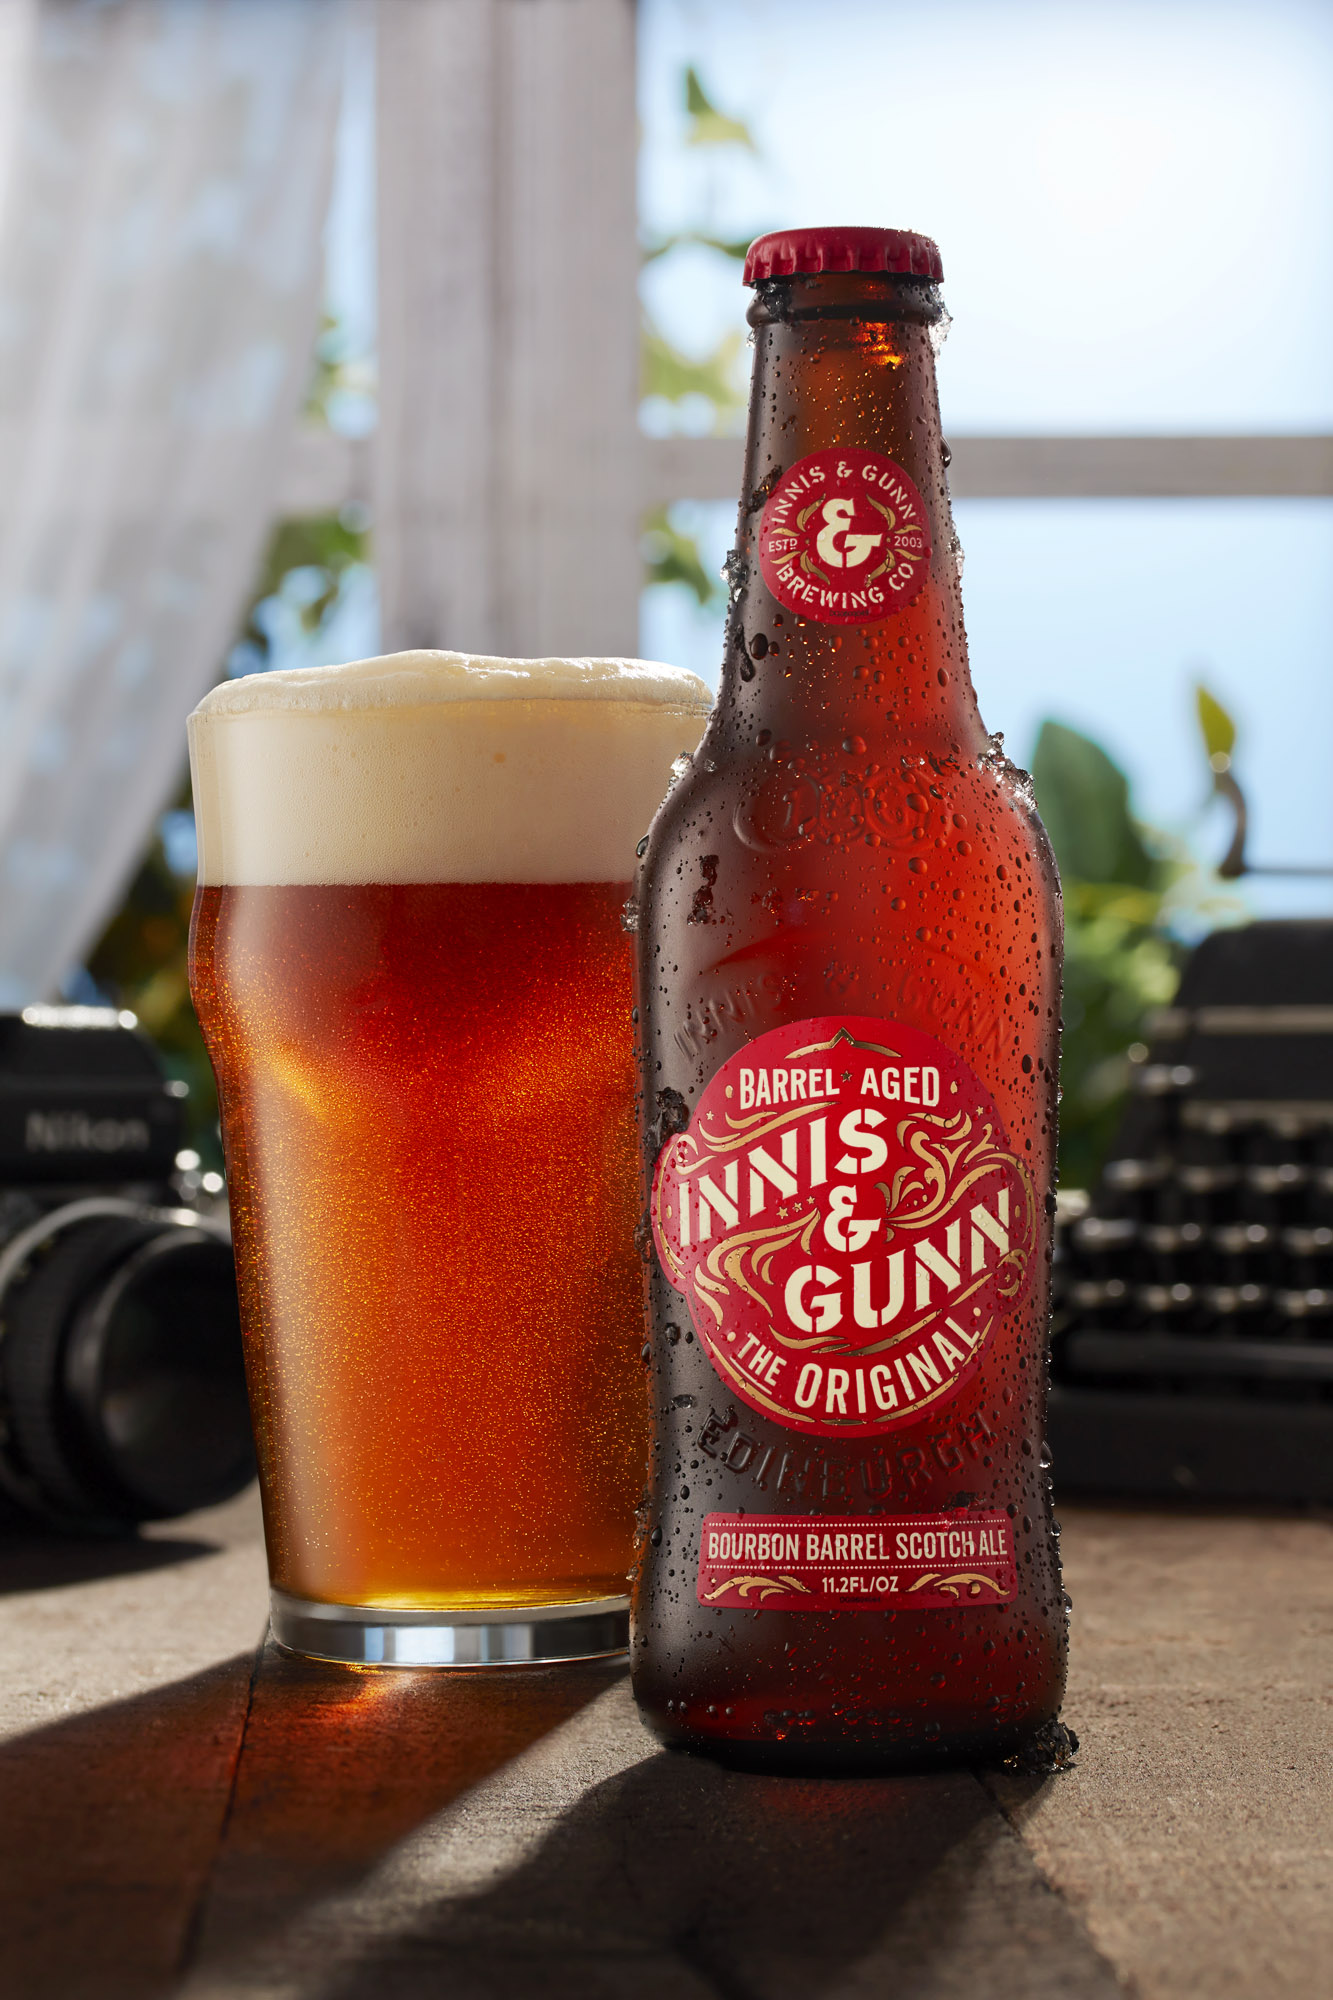
For my shot of Innis & Gunn Original beer the idea didn't start with a mood board or the beer itself. It started with the desire to use a typewriter and my camera as props. Slowly the idea of a traveling photographer and writer drinking a beer at the end of a beautiful day formed in my head.

I decided to switch my typewriter out for a 1930's Underwood Universal. (Also, in great working order.) I felt the Underwood fit the scene and matched the black and chrome of my Nikon F2 better than the Smith Corona tan and green office classic.

I did the walk through video above to show off the set styling as well as the lighting.

Nine Images to Make One

The final images is made up of nine individual images with different elements composited together in Photoshop. After the various pieces are stitched together I go through my normal retouching routine: cleaning, color correction and toning the image

Photographing a Shinny Bottle

On-White Bottle

In this video I walking through my set up for on on-white bottle shot . On-white or ecommerce images can be as complex or as simple as you want them. The question is, does the lighting and final image fit the clients brand.

The bottle I'm photographing is from The Mane Choice, a hair care company that I have had the privilege to photograph for several years. Their bottles and bottle labels are extremely shinny so extra attention needs to be shown to avoid unwanted reflections.

No Reflections

I accomplish this by using diffusion panels on all sides, polarizing filters, and shooting the bottle from a low angle. I put the camera through a hole in the front diffusion panel and I place the camera just below the bottom edge of the label. This does two things: it avoids the bottle reflecting the panel hole and it also gives the bottle a heroic look by looking up to the bottle. (Alternatively, I can place the camera just above the top edge of the label to avoid the unwanted reflection but I think this brand looks better from such an epic perspective.)

The End Result

When I am done I have two images. The main image and a second image I use to make a mask for the text on the label. I don't need the second image but it makes it a lot easier during the retouching process.

Retouching

I made a second video of this bottle going through my step for retouching.